FOR TOYOTA TACOMA MODEL
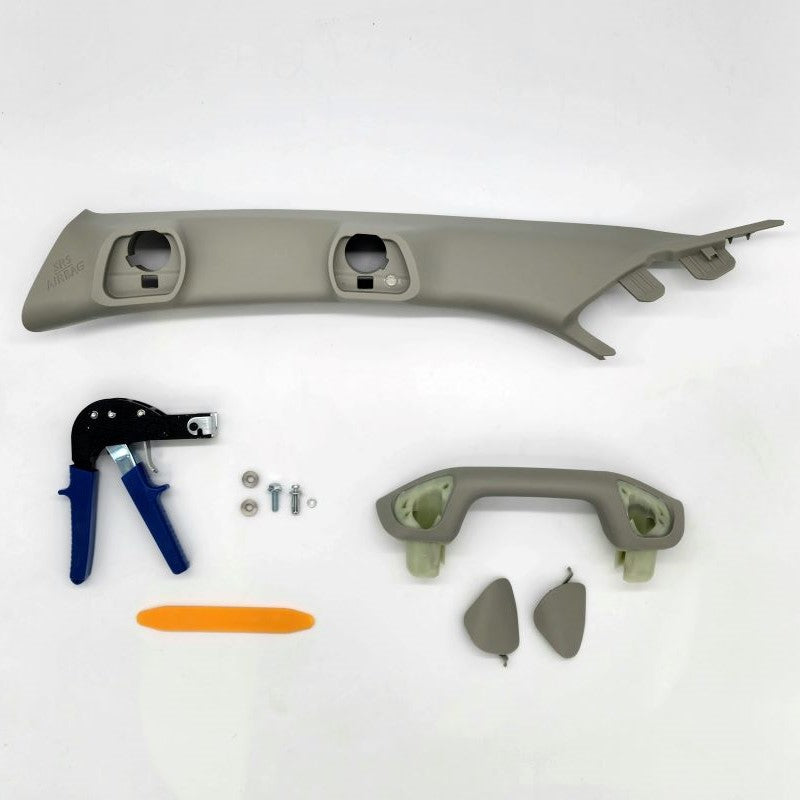
PARTS INCLUDED:
1 x Garnish, Front Pillar (Grey is B0, Black is C0)1 x Tool, Trim Removal
TOOLS NOT INCLUDED BUT ARE NEEDED:
1/2-in Socket (10 mm)
1/2-in Drive Ratchet
Phillips Screw Driver (Recommend Magnetic)
DISCONNECT THE BATTERY BEFORE YOU BEGIN INSTALLATION
Must Press + to see the narrative on each Step